Configure and Enable Certificate
Basic Certificate Configuration
Added following configuration under lms.env.json and cms.env.json in FEATURES flag:
"CERTIFICATES_ENABLED": true,
"CERTIFICATES_HTML_VIEW": true,
"CERTIFICATES_INSTRUCTOR_GENERATION": true
Restarted lms cms services for changes to go in effect.
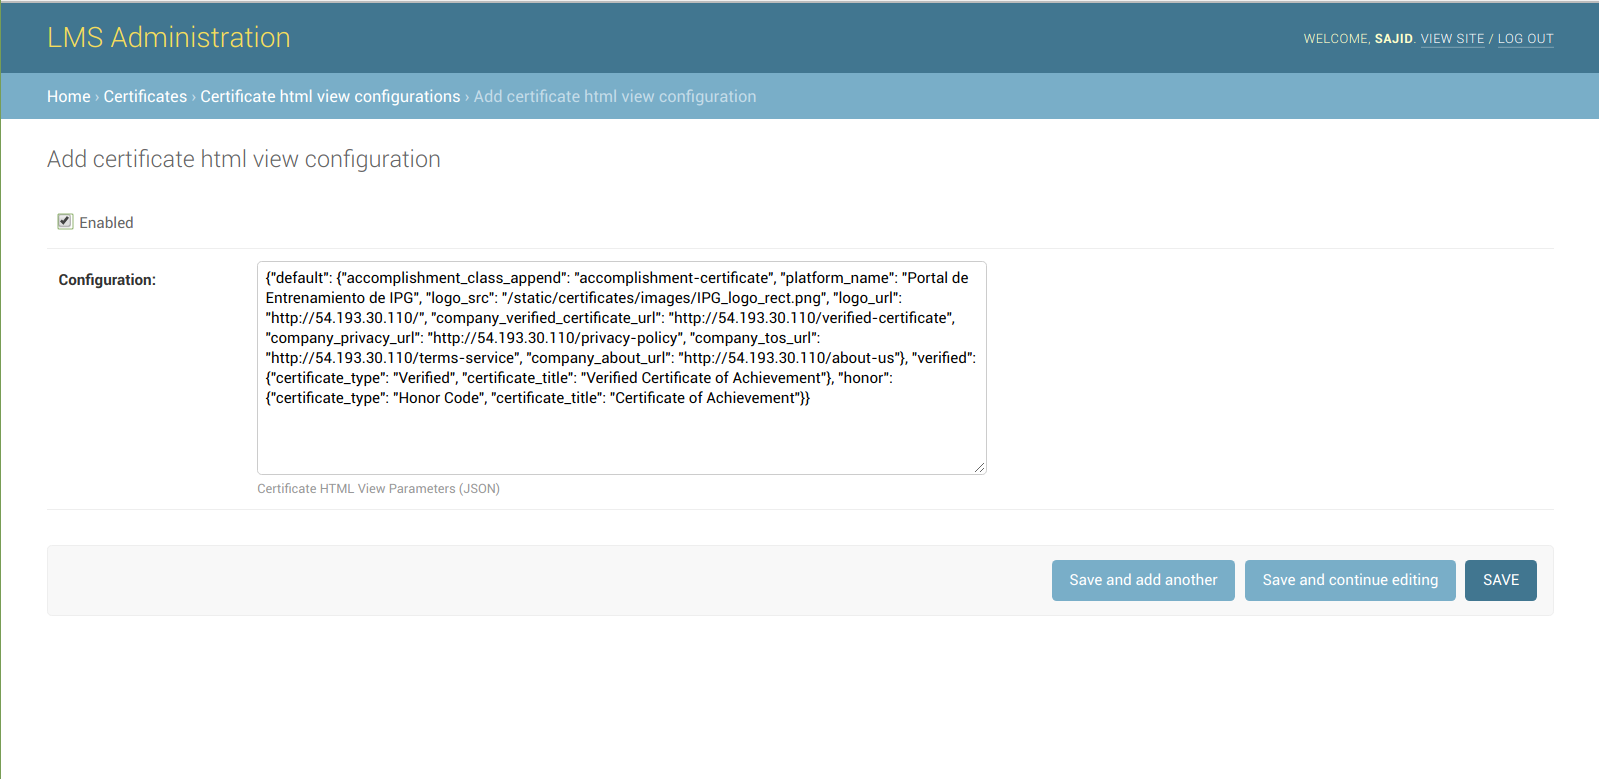
Certificate HTML view configuration
- Go to the Admin Panel by appending /admin on URL.
- Go to the table “Certificate html view configurations” under app “Certificates”.
- Click add button, and you will see a default configuration already made. So, you need only to change the url of your LMS. After changing, it looks something like this (Don’t forgot to enable it).
- Click save the record.
Creating course modes of courses
- Go to the Admin Panel by appending /admin on URL.
- Go to the table “course modes” under app “Course modes”.
- Click the add button so that we can define certificate configuration for each course modes.
- Click save the record.

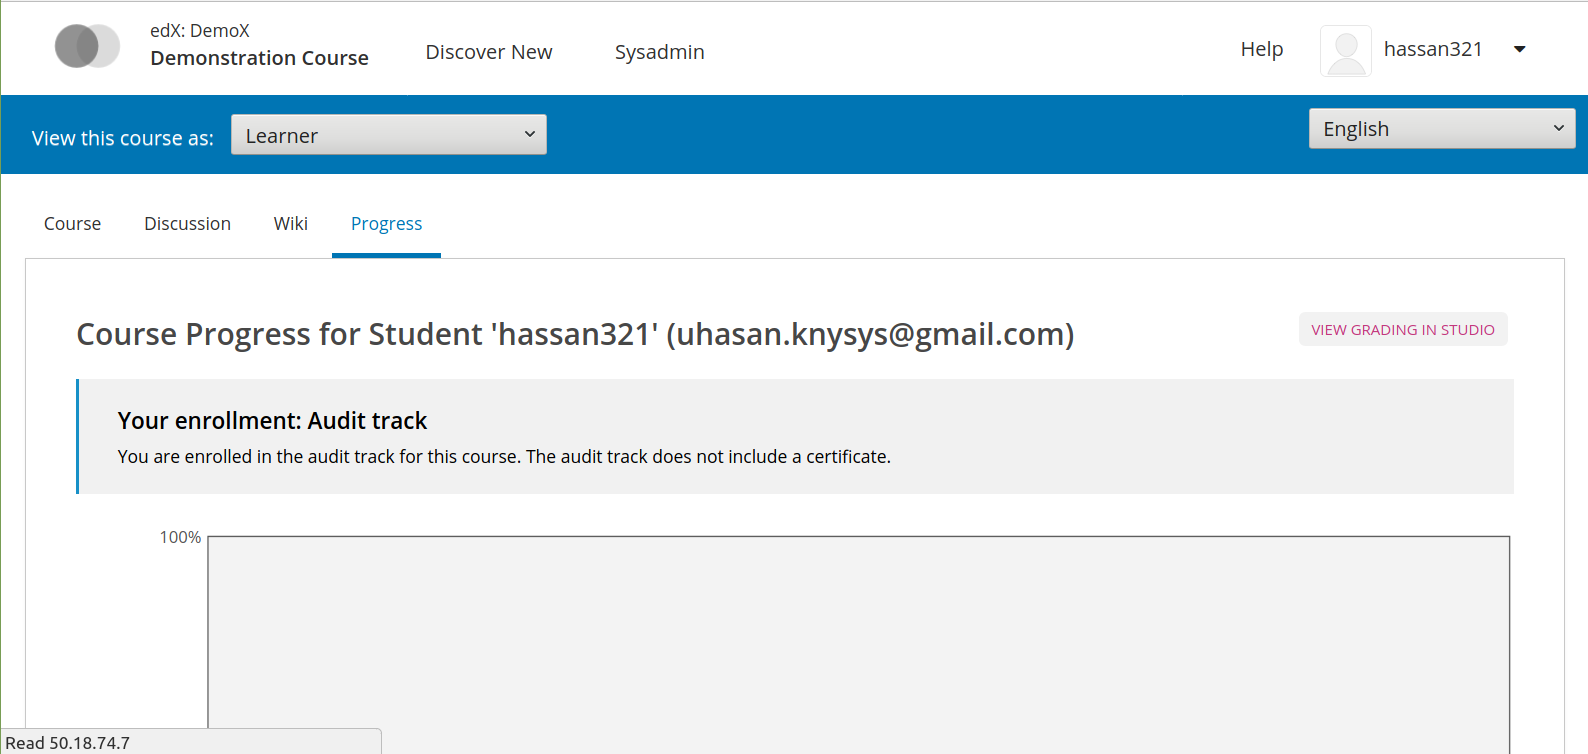
Here client needs to generate record for each course and for each type of course modes (i.e honor, audit, verified etc) the user enrolled into. By default user enrolled into course as an audit enrollment track. For more information regarding course mode.
Activate the course certificate
After saving the record, go to the Studio > click a particular course > Settings > Certificates > Setup your certificate > Save > Activate
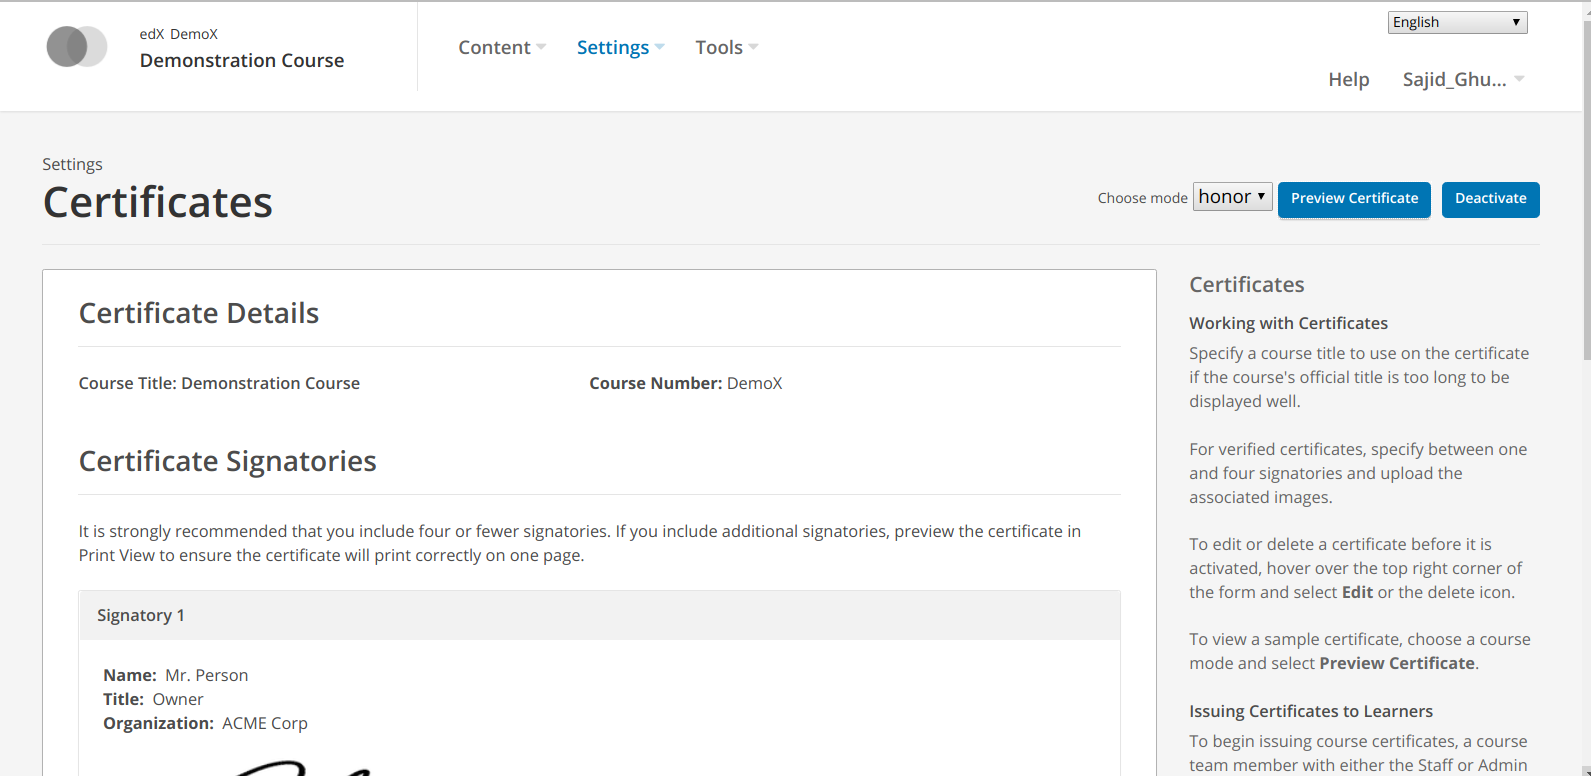
After activating certificate, here you can also define your signatories which appears on certificate. Click on “Preview Certificate” to view the certificate for each course modes. You will see that there is no “Audit” course mode appear on dropdown. Because Audit track is not eligible for Certificate.
Issuing Certificate to Audit Track
By default, certificate can not be issued to users whose enrollment track is audit. So, we needed to override the conditions via code.
Steps for Ironwood release:
Activate edxapp user and open following file using nano editor:
cd edx-platform
nano common/djangoapps/course_modes/models.py
Changed the code to:
ineligible_modes = [cls.AUDIT]
ineligible_modes = []
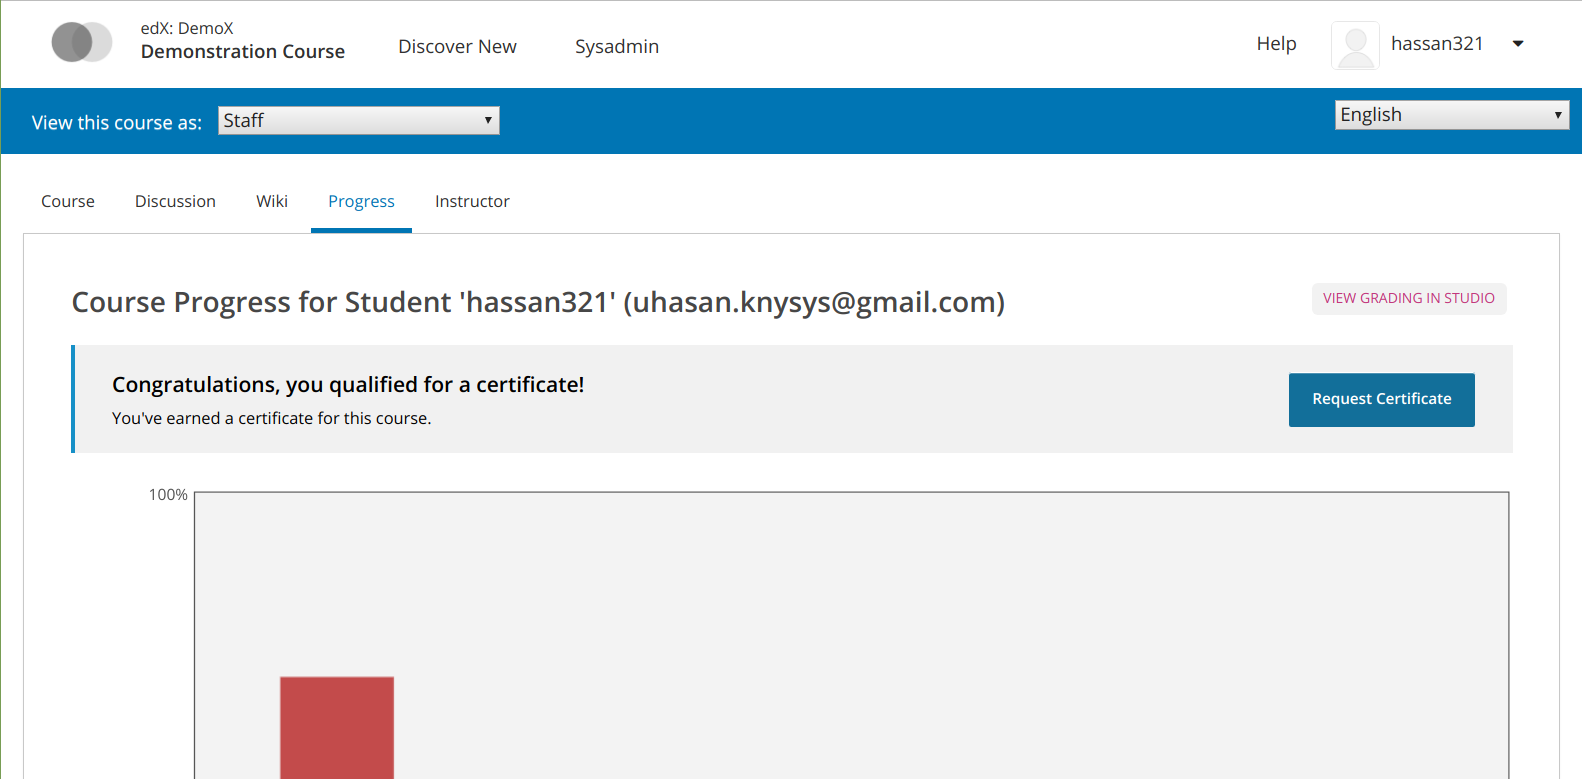
Now, certificate will issue to those users also who have enrolled as an ‘Audit’. When your certificate becomes available, View Certificate option is visible on your dashboard and the course Progress page.
On Demand Certificate Request (Self-Paced Courses Only)
When On-Demand/Student-Generated certificates are enabled for a course, students who has achieved passing marks in the course are allowed to generate their own certificates. There are some configuration needs to be made.
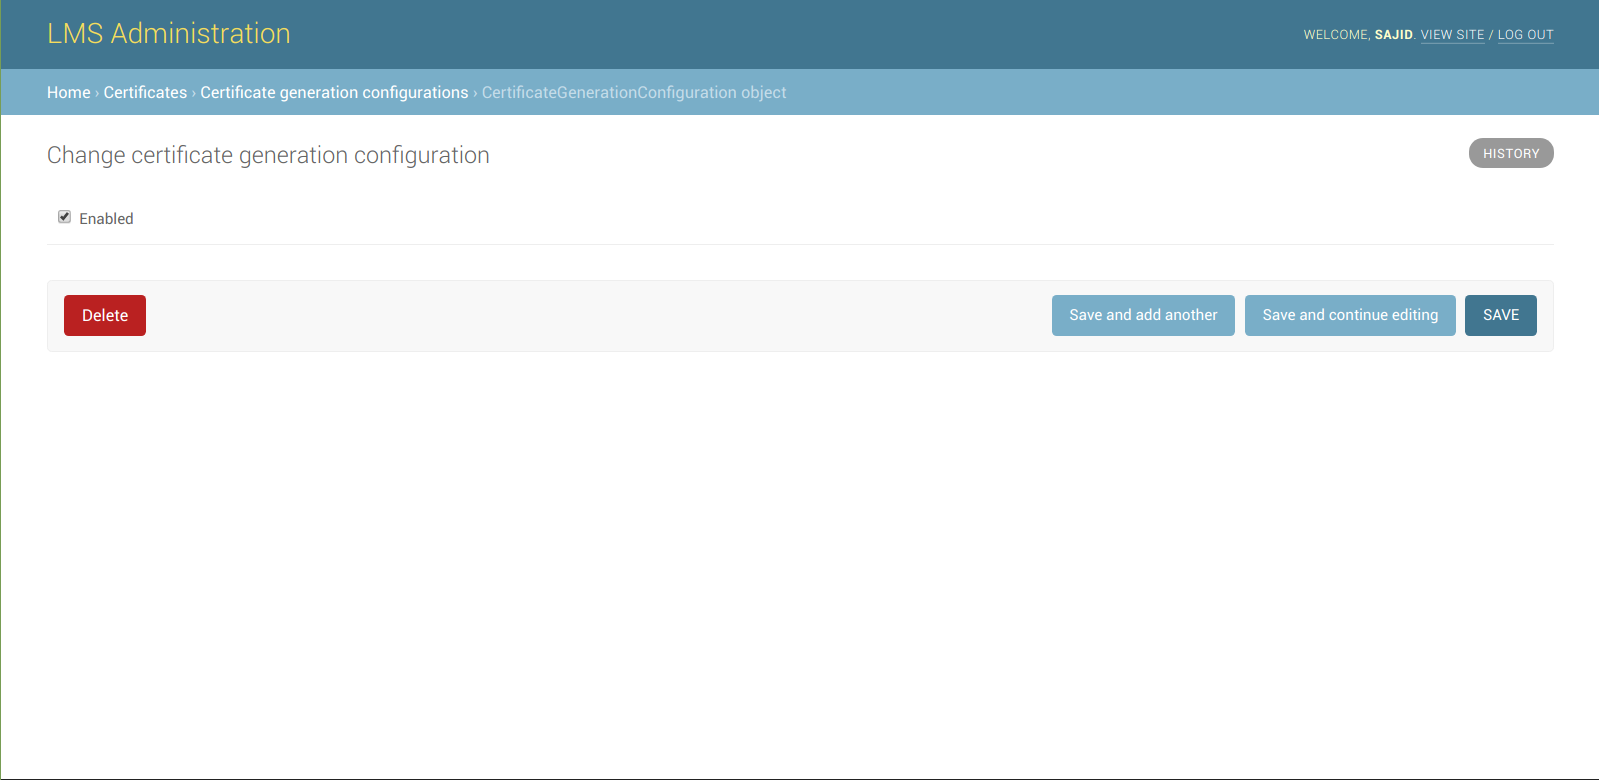
Go to the Admin Panel by appending /admin on URL.
Go to the “Certificate generation configurations” table under “Certificates” and add a new record by clicking enable checkbox.
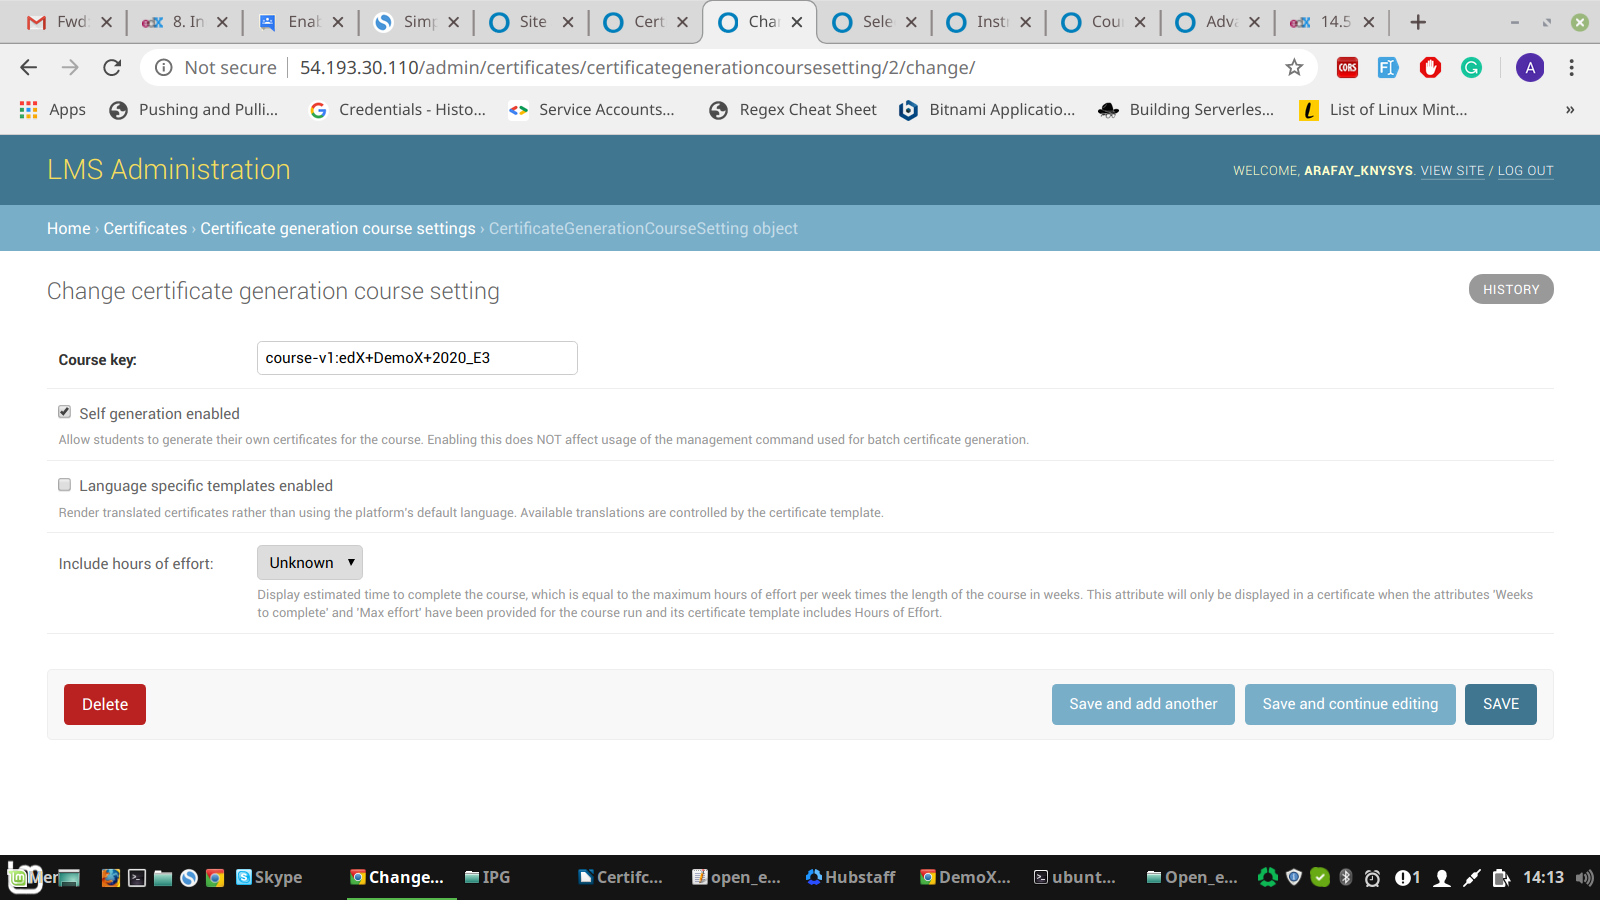
Go to the “Certificate generation course settings” table under “Certificates” and add a new record by selecting course and clicking Self generated enbled checkbox.
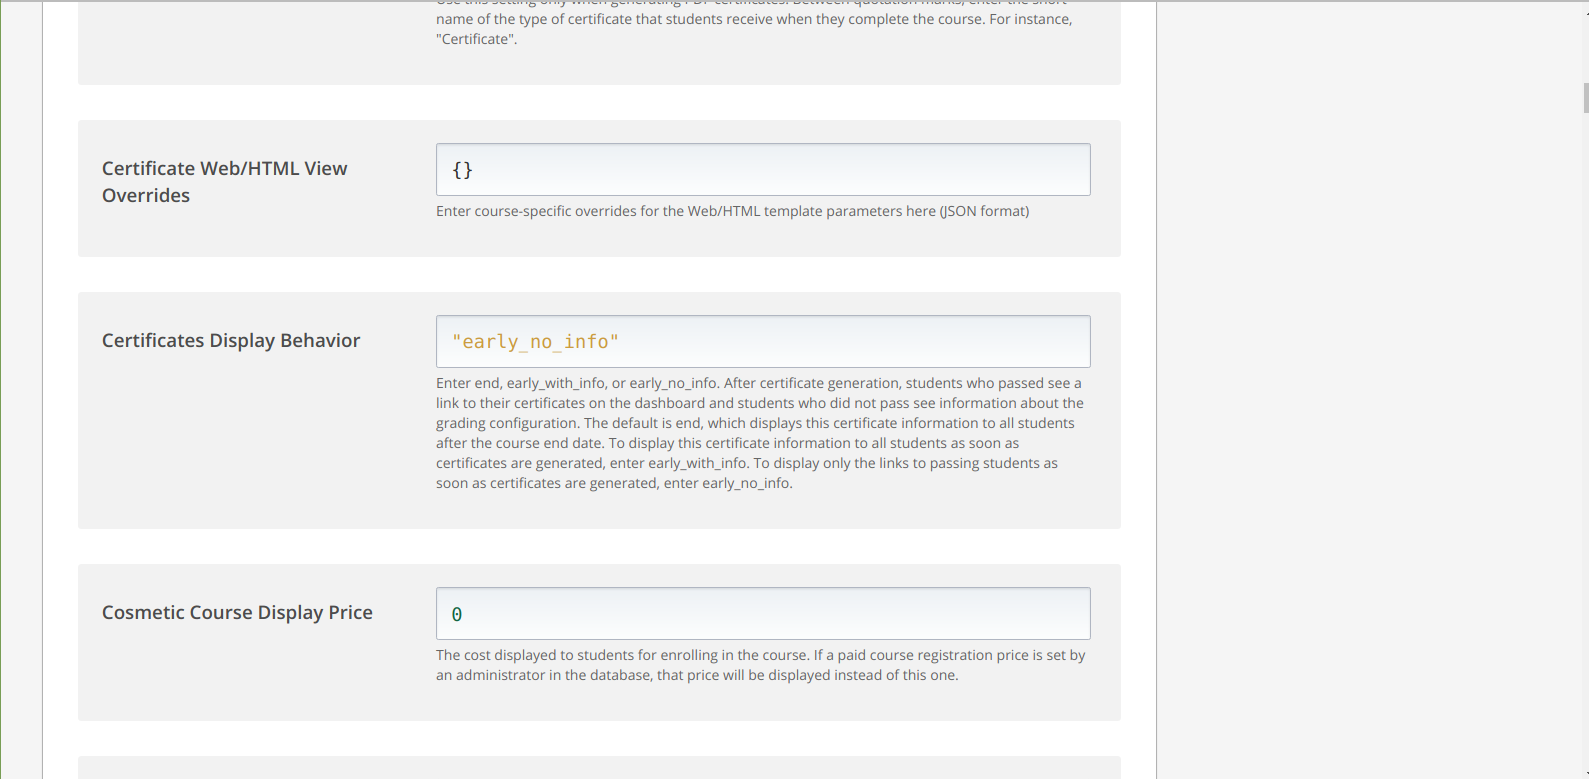
Go to the Studio > Click on a course > Advanced Settings > Certificate Display Behaviour. In the Certificates Display Behavior field, enter "early_no_info". Be sure that you include the double quotation marks.
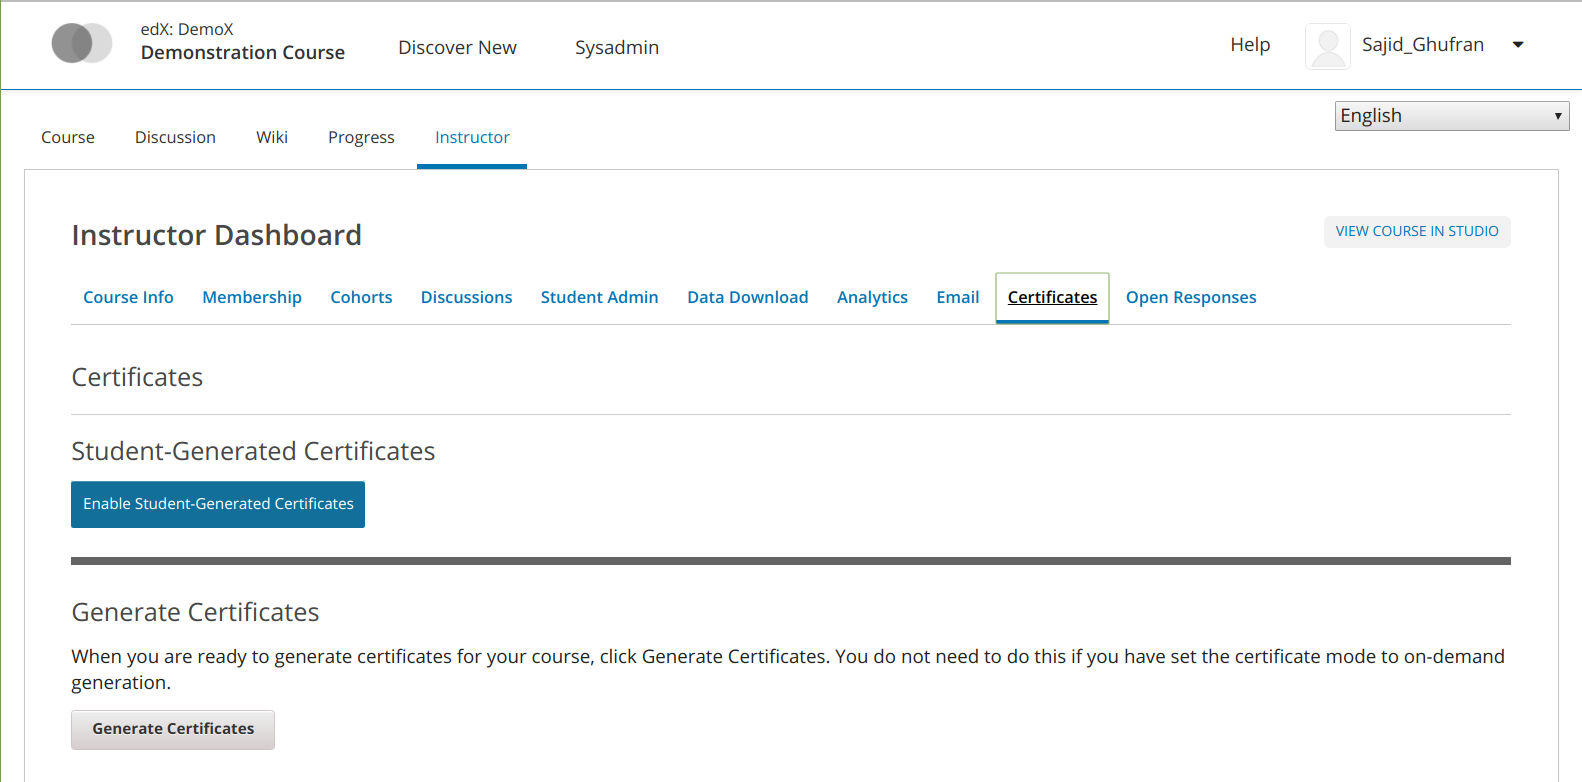
Go to the LMS > Click on a View Course > Instructor > Certificates > Click on “Enable Student-Generated Certificates”.
Note: Step 3, step 4, and step 5 needs to be followed for each course.
Now, after getting the passing marks as described in grading section, user will be prompted to "Request Certificate" on his progress tab.