Pointing on a picture
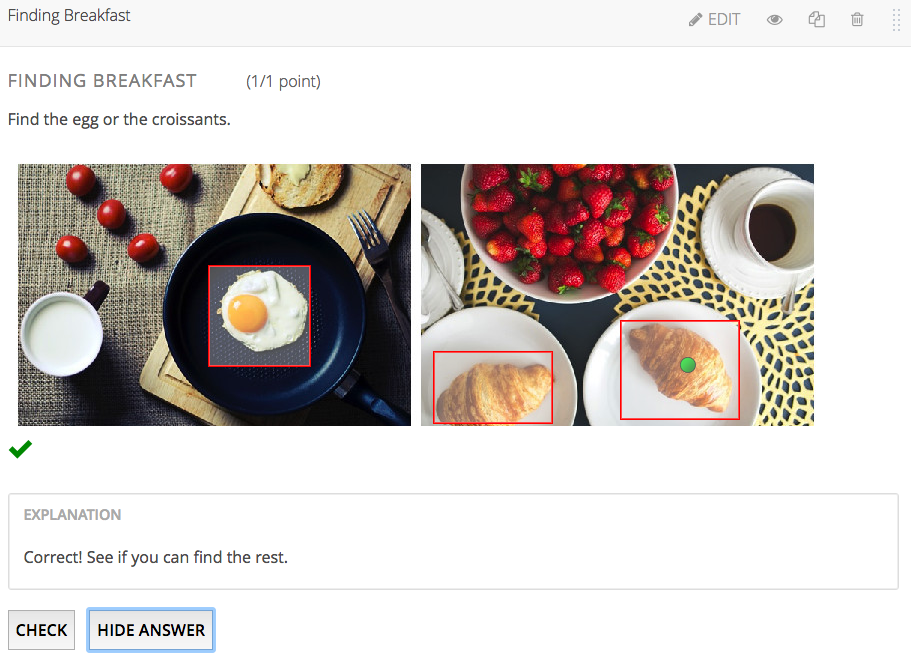
Course creators can build “Point on a Picture” exercises in Edx Studio. Also known as an “Image Mapped Input Problem”, students click on a predefined region on an image to solve a problem. This type of problem works great on a mobile device.
The clickable regions can be:
- A single rectangle.
- Multiple rectangles.
- A geometric shape comprised of three or more coordinate points.
Images and Coordinates
To begin, you will need three things:
One image or multiple images stitched together. (see Combining Images)
Height and width of the image in pixels. (example: 800 x 240 pixels)
Coordinates pairs that define the region or clickable area.
- For a single rectangular region, you need two pairs of coordinates. (Upper left corner and lower right corner of the rectangle.)
- For multiple rectangles, you need two pairs of coordinates for each rectangle.
Getting Started
In Edx Studio, navigate to the Content dropdown and select Files & Uploads to add your image(s).
Go to the Unit where you would like to add the problem.
- Under Add a New Component, select Problems and click the Advanced tab.
- Select Image Map Input.
- When the new component appears, click EDIT.
- This is where you will replace the example text with your own.
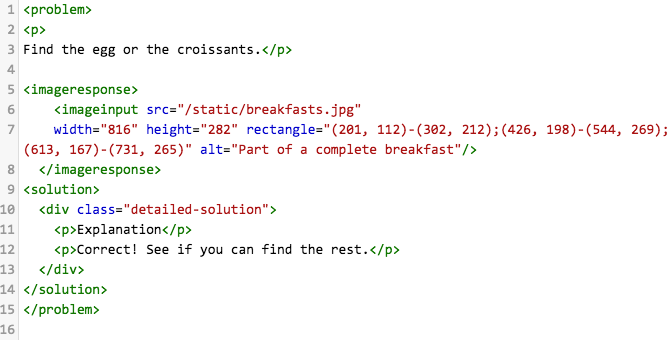
Working with the Code
In the below example, the blue text is where you can edit details for the problem:
<p>
Add a paragraph that describes the problem here.
</p>
<p>Add additional paragraphs or questions here.</p>
<imageresponse>
    <imageinput src="Copy the image link from Files & Uploads and paste here."
    width="Width of image" height="Height of image" rectangle="(X-Axis, Y-Axis)-(X-Axis, Y-Axis)" alt="Describe your image here."/>
</imageresponse>
<solution>
<div class="detailed-solution">
    <p>Explanation</p>
    <p>Here you can explain why the answer is correct.</p>
</div>
</solution>
</problem>
Below is an example of code with three rectangular regions (Notice the three pairs of coordinates):
<p>In the following image, click inside any of the rectangles.</p>
<imageresponse>
    <imageinput src="/static/imageresponse_multipleregions.png" width="450"
    height="450" rectangle="(62,94)-(262,137);(306,41)-(389,173);(89,211)-
    (187,410)" alt="Three rectangles on a white background" />
</imageresponse>
</problem>
Working with Region Coordinates
- Each pair of coordinates refers to a single pixel on your image.
- Two pairs of coordinates point to the upper right corner of the region (first pair) and the lower (second pair).
- A useful program to find pixel coordinates is Free Ruler
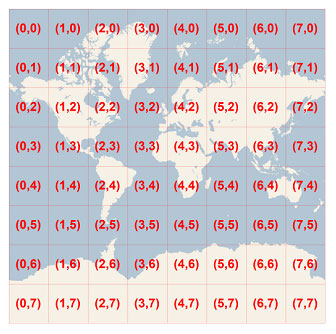
Example: Imagine the image below is 8x8 pixels (each square is 1 pixel):
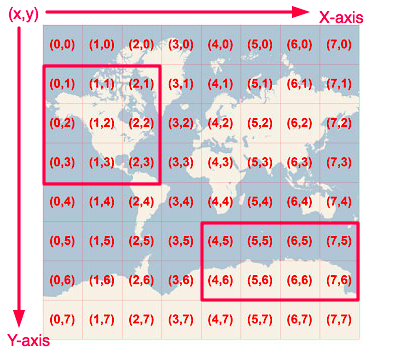
To define the clickable region for two rectangles, we use the following code:
width="8" height="8" rectangle="(0,1)-(2,3);(4,5)-(7,6)"
This is the result:
Combining Images
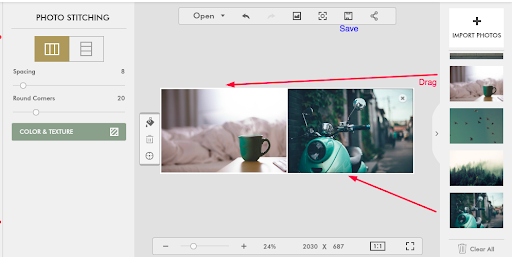
Use the Photo Stitching tool from Fotor to combine two or more images for your Point on Picture problem.
Import the photos from the right side and drag them to the center to combine. Example:
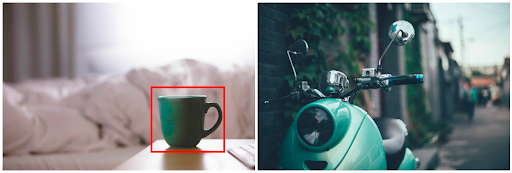
The image will look like this:

Using Free Ruler we can find the pixel coordinates to make a rectangular region around the coffee cup. The top left corner of the cup is approx. (300,176) and the lower right corner is (441,300).
This is the code:
width="1014" height="343" rectangle="(300,176)-(441,300)"
Example in Edx:
See the code below:
For an interactive example, see Point on a Picture Templates in EdX:
- Point on a Picture (2 Images)
- Point on a Picture (3 Images)
- Point on a Picture (4 Images)